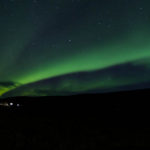
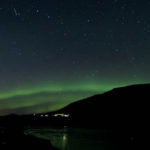
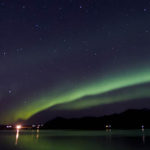
[GUIDE] Photographing the Northern Lights
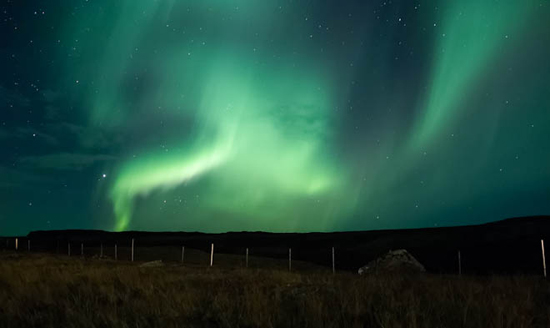
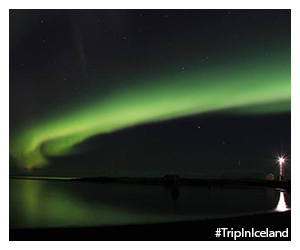
If you are lucky enough to see the Northern Lights then I am sure you will want to be able to photograph them. To some this might seem an impossible task but photographing them is really quite straight forward providing you have right equipment and right knowledge. By Nat & Stu – Where’s My Passport
What do I need?
Northern Lights
Obviously the main thing you need is the main subject itself. Seeing the Northern Lights is truly a magical experience but you do have to have a bit of lady luck to see them. The good thing however is if the lights are not showing then you will be able to photograph the starry sky and get some beautiful photos of the Milky Way and the constellations.
Camera
Some people will say “I can’t shoot them as I need an expensive SLR camera”. Whilst they certainly do make it a lot easier and give you more creative control its not always the case. The main thing you need is a camera that gives you the ability to manually set the shutter speed, aperture and the ISO. Creative compacts such as the Canon G12 or the Olympus PEN cameras will be suffice to allow you to take photos of this phenomenon.
Tripod
Another piece of equipment that will be necessary will be a tripod. You will be taking long exposures that require the camera to remain stable at all times. If you haven’t got access to a tripod then a sturdy wall or rock will do but your camera MUST be stable.
Shutter Release Cable
A shutter release cable will also be a valuable piece of equipment. This will allow you take photos without touching the camera keeping the camera stable. If you do not have a shutter release cable then a good tip is to set the camera to self timer (The setting you use when you want to take a photo of yourself in photo). This will take the photo a short while after you have touched the camera allowing the camera to stabilize before the shot is taken.
A Torch
A torch is also very useful. It will allow you to see the controls on your camera and also will allow to shine it on the ground when framing your shot so you can see how much ground roughly your photo will contain.
Spare Batteries
You will be shooting in cold conditions that will mean that your batteries will drain far quicker than normal. The last thing you want is to run out of batteries right when the Northern Lights are reaching the climax. By having a couple of spares should mean you would be able to shoot throughout the entire night. Keep any spares in your pocket or somewhere warm.
Time
You will need to be very patient because the Northern lights will appear as and when they choose despite you being in the right place and in the right conditions. Some nights may prove to be very fruitful and others may be completely wasted so be prepared to walk away empty handed.
5 steps to photographing the Northern Lights
Step 1 – Set your ISO
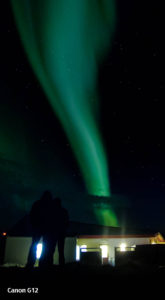
A camera with high ISO capability is required. Generally you will need to shoot at ISO 400 and above. I usually set my camera to 800 on my Canon 7D. This creates images with an acceptable amount of noise allowing me to shorten the exposure time. If shooting with a compact then please look for the ability to set the ISO of the camera quite high. Our Canon G12 can be set to 800 also however the quality is reduced quite a bit to that of the 7D as you can see below:
Step 2 – Set your shutter speed
As described above you will need to set your camera to take long exposures. Times between 7.5 seconds to 30 seconds and above are generally required but this all depends on the f/stop that your camera is set to and the ISO.
Step 3 – Set your aperture
You need to set your camera to the widest possible aperture that your lens allows. This will allow more light to enter the lens, however it will decrease depth of field but this is not an issue. If you would like to add more DOF to your photo then you will need to increase your f/stop but you will also need to counter act this by either increasing your ISO or increasing your exposure time. Each of these will bring a little bit more noise into your photo so it’s a balance between the three settings to what you deem to be an acceptable photo.
It is advisable to use a lens that is fast (f/2.8 and lower). For my shots I use a Tokina 11-16mm f/2.8 lens and the Canon G12 can have an aperture of f/2,8 too.
Step 4 – Focus.
Because you are shooting in the dark your camera will struggle to autofocus your lens. Therefore you will need to set your focus to manual. Once you have done this you will need to set your focus to infinity (∞). Rotate your focus dial to infinity then move it back a notch and this should mean the stars and aurora will be in focus along with the landscape.
You can also try to focus by using the live view mode on your camera. To do this point your camera to the brightest area of interest in the distance and then using live view change your focus until it appears sharp. This can be the brightest star in the sky. It might be tricky to do this but focus is the most important aspect of getting the photo right. When moving your tripod remember to check your focus again as the focus ring could have moved.
Step 5 – Frame and take your shot
Mount your camera onto your sturdy tripod and look through the viewfinder. The chances are you won’t be able to see anything through it. If this is the case then use your torch and shine it on the ground whilst looking through the viewfinder. This will allow you to frame you shot. Remember the rules of thirds so it is good to try and frame the horizon on the bottom third. If you are taking photos of trees in the foreground then you may want to frame them on the top third.
Once you are happy with the framing then push the shutter button to take the shot. You will need to wait until the shutter time has passed before touching your camera again. Once you have taken your shot you may wish to review it to see if the aurora is bright enough or too bright. If they are too bright then you may want to reduce your shutter speed or ISO or increase your f/stop and vice versa if they are too dark. You can also see if you are correctly focused.
Additional Tips
- Shoot in RAW – if your camera is capable of RAW mode then shooting in RAW will allow greater control when editing them later on.
- Turn on Noise Reduction – Noise occurs when pixels get ‘hot’. Turning on noise reduction will detect these hot pixels and compensate for them. One thing to remember however is that you will need to allow for twice the exposure time.
- Take off your lens filters – Lens filters can affect the quality of your images because the light might refract as it travels through the filter and then the lens. Certain lens filters can also reduce the amount of light entering the camera.
- Keep you lens clean – Condensation or frost might appear on your lens so its important to keep them clean. When not in use if you point your camera down towards the ground it will help keep this at bay.
- Check the forecasts here – Forecasts will help increase your chances of seeing the northern lights and avoid wasted long nights
- Scout out locations in daylight – When its dark it will be almost impossible to see the landscape in front of you (unless the moon is lighting it up). Therefore by scouting locations by day will allow you to choose the best spots for the best photos.
About the Author
Stuart Howarth writes for Wheres My Passport along with his wife Natalie Sands. Stu and Nat’s blog shows that you can balance a work life with a serious wanderlust and covers their journeys and experiences along with beautiful photography and photography advice. For more information have a look at their Guest Profile.
If you feel adventurous you could also try creating a time lapse of the Northern Lights like the one seen below:


